
Epoxy Over Plywood and Wood Subfloor
The short answer
Sometimes, and less often than people want. Plywood moves with humidity and deflects under load. Cured epoxy is a rigid, brittle sheet that does neither. That mismatch is the whole problem, and no primer solves it. This page is about the conditions under which a wood subfloor can carry a coating, and how to recognise the floors where it cannot.
Authorized dealer for every brand we carry · Contractor and distributor pricing · Local pickup in Pompano Beach · Free UPS Ground on orders over $150 · We speak English, Spanish and Portuguese
The substrate
Wood is a moving substrate and epoxy is not
Plywood and OSB take on and give up moisture with the air around them, and they change dimension when they do. They also deflect between the joists every time somebody walks across the room. On top of that, the panels are laid with seams, and every seam is a line where two pieces of moving material meet.
A 100% solids epoxy cures to a hard, high strength film with very little elongation. Put that film on a substrate that flexes and the film does not flex with it. It cracks at the point of highest stress, which is almost always a panel seam or a fastener head.
The engineering answer is not a better resin. It is either making the substrate stop moving, or putting something between the wood and the coating that can absorb the movement.
Go or no go
The conditions that decide it
Can work
A stiff, dry, interior, climate controlled floor. Double layer panels or thick single layer, screwed rather than nailed, joists close enough that the floor does not feel springy underfoot, seams filled, and a decorative build rather than an industrial wear deck.
Better route
Put a cementitious layer between the wood and the resin. Cement backer board or a self levelling underlayment rated for wood gives you a stable, non moving surface, and you coat the cement rather than the plywood. This is the build that lasts.
Do not coat it
A springy floor, a floor over an unconditioned crawlspace or vented garage, exterior decking, OSB that has ever swelled at the edges, or any panel that moves when you stand on the seam. The coating will telegraph every one of those problems.
The failure mode
What goes wrong, and where
Seam cracking
The most common failure and the most predictable. A hairline crack appears directly over each panel joint, usually within the first humid season. It follows the seam grid exactly, which is how you know it is substrate movement rather than a mixing problem.
Deflection cracking
Cracks that run across the floor rather than along the seams, usually mid span between joists and in traffic paths. The floor was not stiff enough. Adding coating thickness makes this worse, not better, because a thicker rigid film is a more brittle one.
Edge peel from underneath
Moisture coming up through the panel from a crawlspace or an unconditioned space below cannot escape through a sealed top face. It collects at the bond line, and the coating releases from the edges inward. A coating on top is the wrong place to solve this. The vapor control belongs underneath the floor.
The work
If the floor qualifies, this is the sequence
- Fix the stiffness first. Walk the floor and find the springy spots. Add blocking, add a second layer of panel, or add fasteners until the floor is dead underfoot. Everything after this step is wasted if the floor still moves.
- Screw it down. Nails work loose and become the crack line. Run screws on a tight pattern into the joists and set every head below the surface.
- Check the moisture. Get a moisture meter reading on the panel itself and find out what is under the floor. If the underside is open to humid air, deal with that before you coat the top.
- Sand the face. Take the panel face down to clean, open, uniform wood. Any old finish, glue residue or mill glaze has to go.
- Fill and bridge the seams. Fill the joints and the fastener heads. On a floor you are not putting cement over, expect the seams to remain the weak line no matter what you fill them with.
- Vacuum. Sanding dust is a bond breaker.
- Prime, then coat. Prime the sanded face so the build coat does not soak into end grain unevenly, then build.
What we do and do not supply
We sell the coating side of this job
Latux Epoxy stocks the resins, primers, barriers, tooling and prep equipment. We do not stock cement backer board, self levelling underlayment, joists, blocking or fasteners. On a wood subfloor those come from a building supply house, and on most of these jobs they matter more than the resin does.
We would rather tell you that than sell you a system that lands on the wrong substrate and fails in a year. Call and describe the floor. If the honest answer is that it needs a cementitious layer before we can help, that is the answer you will get.
What to order
The material each step takes
| Step | What it does | What we stock |
|---|---|---|
| Sand the panel face | Opens clean wood and removes mill glaze, old finish and glue residue | Diamond tooling, small and mid grinders |
| Control the dust | Keeps sanding dust out of the air and off the bond line | Dust extractors, dust collectors and vacuums |
| Fill seams and fastener heads | Takes the sharpest stress risers out of the surface | Everflow EF-135 crack filler |
| Prime | Stops uneven absorption into end grain and open plies | Premera FP1 fusion primer, primers |
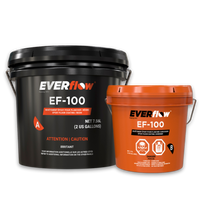
| Build coat over a cementitious layer | The structural layer, once the substrate is stable | Everflow EF-100, epoxy kits |
| Wear course | Takes abrasion and seals the decorative layer | Polyaspartic and polyurethane topcoats |
| Decorative broadcast | Hides minor substrate irregularity and adds grip | Flake and quartz systems, flakes and quartz |
Sizing the job
Bare wood and fresh underlayment both drink
Sanded plywood and green cementitious underlayment are both far more absorbent than finished concrete, so the priming coat goes nowhere near as far as a spec sheet written for a slab suggests. Measure the floor and work the numbers through the coverage guide, and check each product's own figures on the technical data sheets page.
Before you order
Related guides and the rest of the catalog
Talk to a supplier
Send us the floor, not just the square footage
Tell us what is on the slab now, what the moisture test said, and what the floor has to survive. We will spec the system layer by layer and build the material list.
Latux Epoxy
2201 N Andrews Ave, Suite 108
Pompano Beach, FL 33069
(800) 413-1427
Monday to Friday, 8:00 AM to 5:00 PM.
Saturday by appointment.
Sunday closed.