
Can You Put Epoxy Over Tile?
The short answer
Usually yes, but only over tile that is still firmly bonded to the slab, and only after the glaze has been ground off. Epoxy does not stick to a glaze. It sticks to what you open up underneath it. Below is the sequence that works, the two ways it fails when the prep is rushed, and the two situations where pulling the tile is the cheaper decision.
Authorized dealer for every brand we carry · Contractor and distributor pricing · Local pickup in Pompano Beach · Free UPS Ground on orders over $150 · We speak English, Spanish and Portuguese
The substrate
Glaze, grout and thinset are three different surfaces
Ceramic and porcelain tile is a fired clay body with a vitrified glaze fused to the face. That glaze is the problem. It is dense, effectively non porous, and chemically closer to glass than to concrete, so a coating laid straight onto it has nothing to key into. The grout joints between the tiles are the opposite: porous, absorbent, and sitting 1/16 to 1/8 of an inch below the tile face. Underneath both is the thinset holding the whole assembly to the slab.
A coating going over tile has to solve all three at once. Profile the glaze so the coating has a mechanical key, bring the joints flush so they do not print through, and confirm the thinset is still holding before you spend money on resin.
Go or no go
When coating over tile is the right call
Good candidate
Tile bonded solid across the whole floor, laid on a concrete slab, indoors, grout joints intact, and a slab that passes a moisture check. This is the normal case and it coats well.
Fixable first
A handful of drummy or cracked tiles, hollow spots under roughly ten percent of the floor, worn or stained glaze, or a few open grout joints. Pull and patch the bad tiles, then treat it as a good candidate.
Pull the tile instead
Tile set over a wood or plywood subfloor, widespread hollow sound, a slab crack running through the tile that is still moving, or a slab that fails a moisture test and cannot take a barrier. Coating these is money spent twice.
If the tile is sitting on plywood rather than concrete, the substrate question changes completely and the tile is the least of it. Read epoxy over plywood and wood subfloor before you price anything.
The failure mode
What actually goes wrong when the prep is skipped
Two failures show up on coated tile, and both are prep failures rather than product defects.
Sheet delamination
Coat over intact glaze and the epoxy has no mechanical key. It holds by surface contact alone until the first hot tire, dropped tool or thermal cycle breaks it, and then it lifts in sheets with the tile grid printed on the back. There is no second coat that fixes this. The floor comes off and the prep gets done properly.
Grout line telegraphing
Coat without filling the joints and the resin flows into every one of them. As it cures it shrinks slightly, and the shrinkage is deepest where the film is thickest. Six weeks later the entire tile grid is visible through a floor that looked dead flat on day one. Filling the joints first is what prevents it.
The work
The prep sequence that holds
- Sound the floor. Tap every tile with the handle of a screwdriver or drag a chain across the floor. A hollow ring means the thinset has let go under that tile. Mark them and pull them.
- Patch the voids. Fill where tile came out, back up to the tile face, so the finished surface sits in one plane.
- Grind the glaze off. This is the step everyone wants to skip and the one that decides the job. Take the glaze down with diamond tooling until the face reads dull and uniform with no shine left anywhere, aiming at an open profile around ICRI CSP-2. Porcelain is harder than ceramic and takes longer. Budget for it.
- Fill the grout joints. Bring every joint flush with the tile face using an epoxy crack filler, let it cure, then grind it flush.
- Vacuum, then vacuum again. Ground glaze dust is a bond breaker and it hides in the joints and at the perimeter.
- Prime. A fusion primer wets out the profiled face and gives the build coat one uniform surface instead of two different ones.
- Coat. Build coat first, wear course over it.
Moisture
Test the slab before you commit
Tile hides moisture. A slab that has been covered for fifteen years has been quietly passing vapor into the thinset that entire time, and nobody sees it until a coating traps it. Before you order material, pull a tile in the lowest or dampest part of the floor, tape a two foot square of clear plastic sheeting flat to the exposed concrete, seal all four edges, and leave it 24 to 48 hours. Condensation underneath, or a dark patch on the slab when you lift it, means the concrete is passing vapor.
That is not a reason to stop. It means the system starts with a moisture vapor barrier instead of a color coat. On a South Florida slab on grade, assume you will need one until a test says otherwise.
What to order
The material each step takes
| Step | What it does | What we stock |
|---|---|---|
| Grind the glaze | Removes the vitrified face and opens a profile the coating can key into | Diamond cup wheels, small and mid floor grinders |
| Control the dust | Keeps ground glaze and silica out of the air and off the customer | Dust collectors and vacuums, dust extractors |
| Fill the joints | Brings grout lines flush so they cannot telegraph through the finish | Everflow EF-135 crack filler |
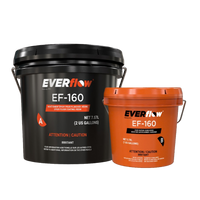
| Barrier, if the slab reads damp | Controls vapor emission before it reaches the build coat | EF-160, moisture vapor barriers |
| Prime | Wets out the profiled tile and unifies two different absorbencies | Premera FP1 fusion primer, primers |
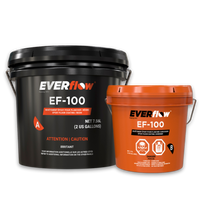
| Build coat | The structural layer that carries the traffic | Everflow EF-100, epoxy kits |
| Wear course | Takes the daily abrasion so the color layer is protected | Polyaspartic and polyurethane topcoats |
| Lay it off | Spreads the build coat evenly and lets you walk the wet floor | Latux flat squeegee, spike shoes |
Sizing the job
Do not price a tile floor off the pail
Profiled tile and freshly filled joints both drink more than finished concrete, so the first coat goes further on paper than it does on the floor. Measure the actual footage, add for the joints, and run the kit math through the coverage guide rather than the figure on the label. Every product on this page has its own numbers on its technical data sheet.
Before you order
Related guides and the rest of the catalog
Talk to a supplier
Send us the floor, not just the square footage
Tell us what is on the slab now, what the moisture test said, and what the floor has to survive. We will spec the system layer by layer and build the material list.
Latux Epoxy
2201 N Andrews Ave, Suite 108
Pompano Beach, FL 33069
(800) 413-1427
Monday to Friday, 8:00 AM to 5:00 PM.
Saturday by appointment.
Sunday closed.